· ARUM Team · Installation
COB LED Strip Troubleshooting — Causes and Step-by-Step Fixes
Diagnose and fix the most common COB LED strip problems — dimming at the far end, flickering, heat, moisture damage, and how to prevent them from recurring.
COB LED strips are popular for their smooth, dot-free light — but after running for some time, problems like dimming, flickering, or uneven brightness can appear. Before reaching for the replacement strip, work through this diagnostic process. Most issues have fixable root causes.
Five Most Common Root Causes
1. Voltage drop at the end of the run COB 24V strips over 5 meters of continuous run without mid-point injection will show visible dimming at the far end. Current flowing through the strip’s copper traces loses voltage proportionally to distance.
2. Undersized or low-quality power supply A PSU running near its rated limit (e.g., 100W PSU driving 100W of strip) will overheat, voltage output will become unstable, and the PSU will fail within months.
3. Reversed polarity or loose connection COB LED is DC — polarity matters. Reversed connections prevent the strip from lighting (but won’t immediately damage a quality strip). Loose solder joints or clip connections cause intermittent flickering.
4. Moisture reaching the strip IP20 strips exposed to kitchen steam, bathroom humidity, or outdoor conditions will develop oxidation at the copper pads over time, degrading electrical contact.
5. Insufficient heat dissipation COB strips run significantly hotter than SMD due to higher chip density. Without aluminum channel mounting, junction temperatures can exceed safe limits — reducing a 50,000-hour lifespan to 15,000 hours or less.
Diagnostic Steps (Before Replacing Anything)
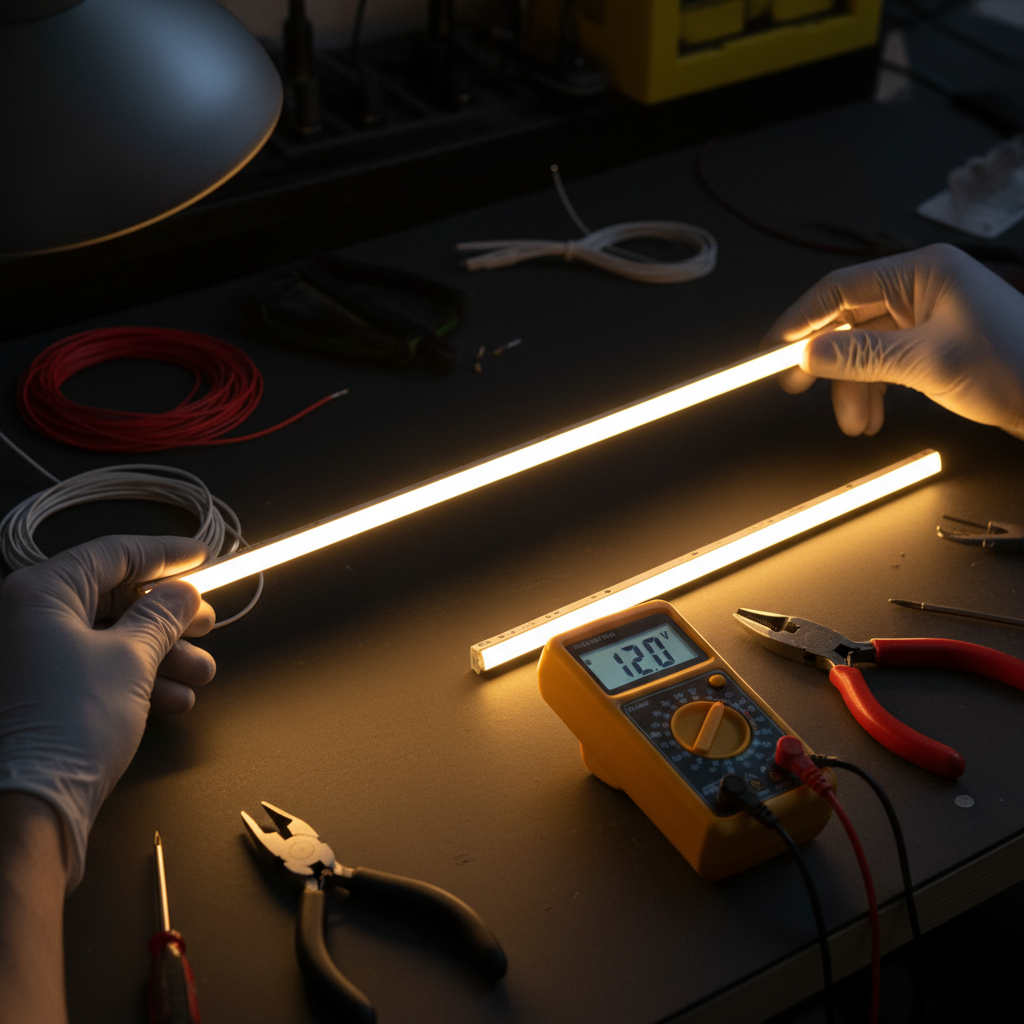
1. Check PSU output voltage Use a multimeter at the PSU DC output terminals. Should read 24.0V ±0.5V (or 12.0V ±0.3V for 12V systems). Below spec indicates PSU degradation or overload.
2. Check voltage at strip start vs. strip end If start reads 24V but end reads 20V, that’s more than 17% voltage drop — visible dimming is expected and the cause is confirmed as voltage drop (solution: dual feed or shorter segments).
3. Check connections Gently wiggle connection points while the strip is powered. If flickering correlates with movement, the solder joint or clip is loose.
4. Check strip temperature Hold the aluminum channel (not the strip directly) after 30 minutes of operation. Should feel warm but not painful to touch. Above 65°C indicates inadequate heat management.
5. Inspect for moisture/oxidation Look at exposed copper pads and connector points. Green or white residue = oxidation from humidity — clean with isopropyl alcohol and apply electrical contact spray.
Step-by-Step Fixes
Fix 1: Address voltage drop For runs over 5 meters: implement dual feed (connect PSU positive and negative to both the start AND the end of the run). This halves the effective strip run length and reduces voltage drop by approximately 75%. Alternatively, split the run into 5-meter segments with individual injection points.
Fix 2: Upgrade the power supply Replace the PSU with one that has 25% headroom above the actual strip load. If the strip draws 100W, use a 120–150W PSU. A cooler-running PSU will last significantly longer.
Fix 3: Improve heat management If the strip isn’t already in an aluminum channel, install it in one. This is not optional for COB strips used more than 2 hours per day. An aluminum channel reduces junction temperature by 17–24°C.
Fix 4: Repair or replace connections Use quality solderless clip connectors or re-solder with fresh solder. Cover all connection points with heat shrink tubing. Never leave connection points exposed.
Fix 5: Test for 1 hour before sealing After any repair, run the full system for 1 hour to confirm stable operation before re-sealing any ceilings or covers.
Prevention Checklist
- Quality PSU with trusted brand (Meanwell, Arum equivalent) — avoid suspiciously cheap no-brand units; they lack protection circuits
- Always use aluminum channels for strips running more than 2 hours/day
- Match IP rating to environment — IP20 for dry indoor, IP65 for steam/humidity, IP67 for outdoor rain exposure
- Install a DC fuse or breaker between PSU and strip, rated at 125% of the PSU’s output current
- Annual inspection — dust the channel, check connector integrity, wipe strips clean with a dry cloth
When to Replace Instead of Repair
Quality COB LED strips are rated for 30,000–50,000 hours (L70 — brightness maintained at 70% of original). At 8 hours/day, that’s 10–17 years.
Signs it’s time to replace:
- Brightness has dropped more than 30% from the original output level
- Permanent dark sections that don’t respond to connector repair
- Visible color shift (warm white appearing yellow or showing pink spots)
- Burn marks or charring on the strip surface
- PSU trips immediately on powering on
Arumstores offers COB LED strips in IP20 for dry indoor applications and IP67 for outdoor use, along with aluminum channels, Meanwell PSUs, and expert support for system design.
Summary
The large majority of COB LED problems originate from three sources: voltage drop from long single-segment runs, undersized power supplies, and inadequate heat management from skipping aluminum channels. Diagnose methodically and fix the root cause — don’t just replace the strip. Browse all COB products.